Function MakeRandom(ByVal min, ByVal max)
MakeRandom = CInt(Int((max - min + 1) * Rnd())) + min
End Function
Const BAM_VERSION = 0
xBAM.CreateAllExt
Class Particle
' Basic variables
Public Bulb, BulbExt, Index
Public LifeSpan
' Parameters
Public sX, sY, sZ, mX, mY, mZ, sBrightness, mBrightness, Randomness
' Define(Particle, Start X, Start Y, Start Z, Move X, Move Y, Move Z, Start Brightness, Move Brighness, Randomness)
Public Function Define(p, s_x, s_y, s_z, m_x, m_y, m_z, s_bright, m_bright, random_lvl)
Set Bulb = p
Set BulbExt = Eval(p.name + "Ext")
sX = s_x : sY = s_y : sZ = s_z : mX = m_x : mY = m_y : mZ = m_z
sBrightness = s_bright : mBrightness = m_bright : Randomness = random_lvl
Refresh()
End Function
Public Function Desv()
If (Randomness = 0) Then
Desv = 0
Exit Function
End If
Desv = (Randomness * Rnd()) - (Randomness * Rnd())
End Function
' Set particle to its original position
Public Function Refresh()
BulbExt.SetPosition sX + Desv, sY + Desv, sZ + Desv, False
Index = 0
LifeSpan = MakeRandom(10, 100)
BulbExt.GlowBrightness = sBrightness
End Function
' Update the particle
Public Function Update()
Index = Index + 1
If (Index > LifeSpan) Then
Refresh()
Exit Function
End If
BulbExt.SetPosition BulbExt.X + mX + Desv, BulbExt.Y + mY + Desv, BulbExt.Z + mZ + Desv, False
BulbExt.GlowBrightness = BulbExt.GlowBrightness + mBrightness
End Function
End Class
Class ParticleEffect
Public Particles(), ParticlesLength
' Start with no particles
Private Sub Class_Initialize()
ParticlesLength = 0
End Sub
' Add a particle to the effect
Public Function PushParticle(ByVal p, s_x, s_y, s_z, m_x, m_y, m_z, s_bright, m_bright, random_lvl)
Dim CurrentParticle
Set CurrentParticle = New Particle
CurrentParticle.Define p, s_x, s_y, s_z, m_x, m_y, m_z, s_bright, m_bright, random_lvl
ParticlesLength = ParticlesLength + 1
Redim Preserve Particles(ParticlesLength)
Set Particles(ParticlesLength) = CurrentParticle
End Function
' Update
Public Function Update()
Dim i : For i = 1 To ParticlesLength
Particles(i).Update()
Next
End Function
End Class
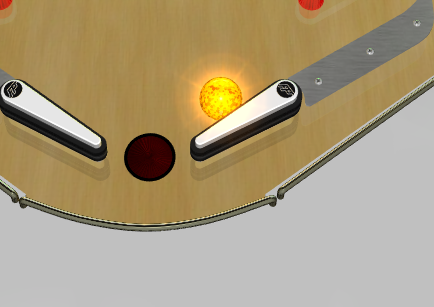
Dim Fire
Sub BAM_Init()
Set Fire = New ParticleEffect
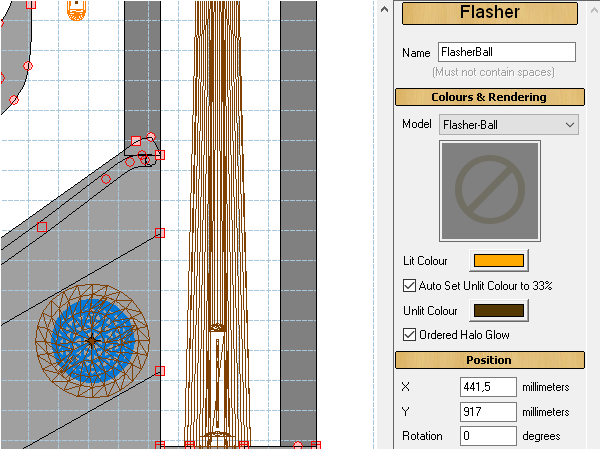
' Create a particle effect with 16 particle bulbs called P1, P2, ...
Dim i : For i = 1 To 16
Fire.PushParticle Eval("P" + CStr(i)), 257, 197, 0, 0, 0, 0.5, 1, -0.01, 1
Next
End Sub
Sub FireTimer_Expired()
' Update all the particle effects here
Fire.Update()
End Sub


 ... but you can't orientate it in the good angle actually )
 )
) ) and maybe James (Greywolf).