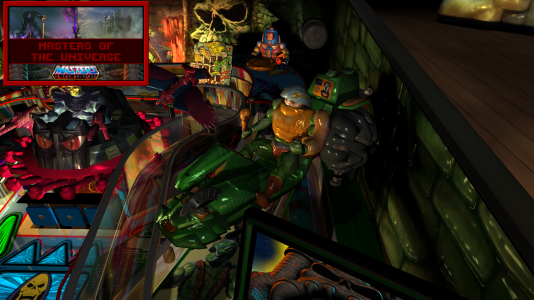
WIP Original Table FizX BAM FP Masters of the Universe - Collector's Edition

Future Pinball
New mode

TEELA'S TRAINING

Just a quick peek at some pics of my new completed mode.

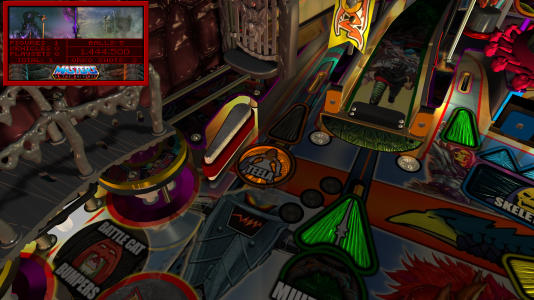
I've added a new left orbit shot and inserts for Teela's mode. You must hit the left orbit once to make the mode "ready", then 3 shots to the left orbit to start the mode.
MOTU CE - Teela 1.png


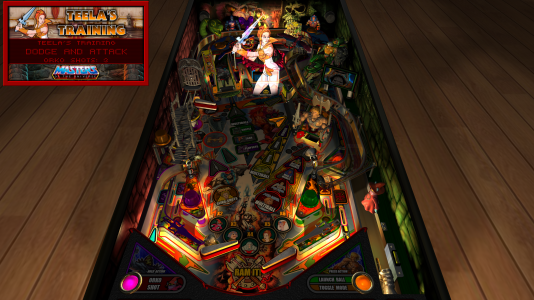
Teela is always "training" Adam for better swordsmanship. In this mode you must train with Teela to get better and better. Her hologram appears, and you must make the lit shot to try to dodge her.
MOTU CE - Teela 2.png


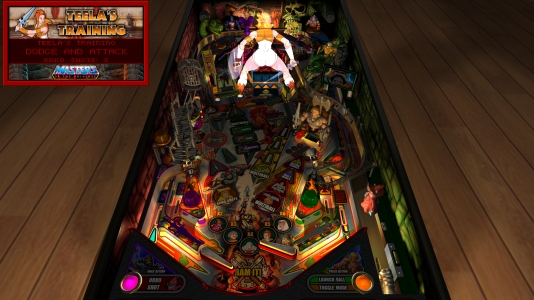
With her turned around facing away from you, you must try to sneak up behind and "attack" her for the next shot.

MOTU CE - Teela 3.png


When you do this, Teela will voice how she feels about you trying to sneak a shot up from behind! Oh my!

Then she'll ready herself for another shot. Repeat this process until the Skeletor target bank lowers. Then you can make the last shot to complete the mode.

I'll post a video demo of the entire mode soon.
 
Mass talent right here guys
 
TEELA'S TRAINING

(video demo of new mode)

=================================

Teela is always "training" Adam for better swordsmanship. In this mode you must train with Teela to get better and better. Her hologram appears, and you must make the lit shot to try to dodge her.

With her rear facing you, you gotta take your shot on the center targets! However, Teela ain't taking your shit!

Repeat this process until the center target bank opens... and you can finish your "training"...

View attachment motu ce - teela_1.mp4
 
Last edited:
this looks so cool. top of my wish list. 👍
 
She-Ra Sling-Shots - "Who are you... WOMAN!?"

(video demo of updated new mode)

I've finally been completing some of the previous modes I was working on. For She-Ra Sling Shots, if you hit the slings enough times, the mode starts.

You need to hit all the jackpot shots. Then that opens open the final shot which is at Skeletor.

If you complete the mode in time, you are rewarded with the She-Ra action figure.

If you fail.... "Ah! Just like a woman". Yes, Skeletor is not nice :)

View attachment motu ce - shera_1.mp4
 
Rom did a great job at making models for the original table many years ago, given what limited resources he had back then.

Today, you can find 3d scans of the original 80's toys, or many detailed models built from scratch with modern 3D modeling apps. 3d printers and scanners have really opened up many great resources, or possibilties to learn how to make new models.

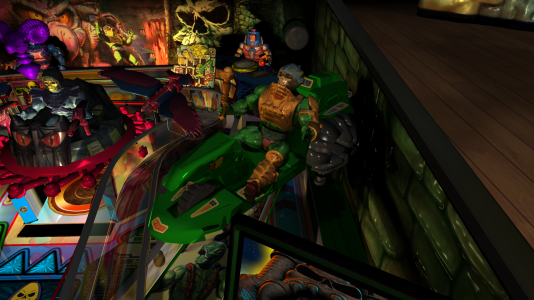
Well... I finally decided to make new models for the Road Ripper and Man at Arms.

Out with the old...

motu ce - road ripper - old 1.png


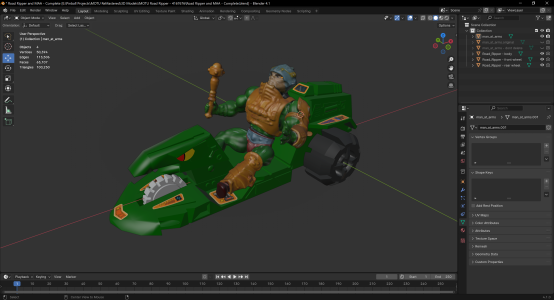
Create the new models...

Lots of new modeling, converting, remeshing, uvwrapping, painting, and fixing scanned models...

1712532282269.png


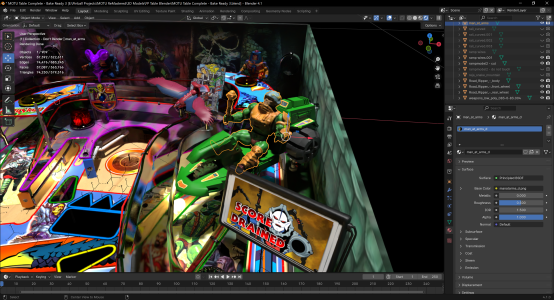
Then some baking for realistic looking shadows...

1712532339869.png


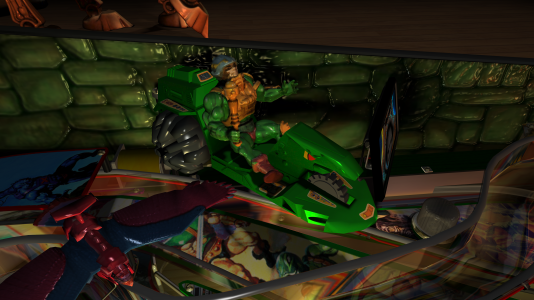
...and FINALLY... in with the new in the actual game!

Turned out GREAT! The detailed models with baked shadows combined with FP's realtime dynamic lighting looks so good!

1712532452137.png

1712532491045.png
 
@Terry
I can't wait to see when it comes out... it's already been several months of work. Are you going to move on to a next title afterwards?
 
@Terry
I can't wait to see when it comes out... it's already been several months of work. Are you going to move on to a next title afterwards?

Yes, I will do this one until completion (still long ways to go), including PinEvent V2. Then it's most likely back to Silent Hill.
 
Road Ripper Multiball

=================================

Quick demo of Road Ripper multiball. I initially struggled with how to "end" all the multiball modes. The objective of this new game is to complete every mode and be rewarded with an MOTU toy for each mode, and to collect as many as you can... with points being the secondary reward. I didn't want multiball modes to just go on endlessly getting more and more points, as this will be a BIG game when done. I wanted you to be able to "complete" each mb mode, and have it "end" similar with how other modes end (rewarded with toy).

So you do the first phase by hitting each of the 4 jackpot shots. During this time, if you drain to one ball then the mode ends (like any multiball). If you hit all jackpots, then Skeletor's target bank drops. Now Super Jackpot is Ready.

From this point on, the mode won't stop unless you drain ALL balls. So if you have one ball left, you can still complete the mode. You now have to shoot as many of your remaining balls at Skeletor as you can, until none remain. You are rewarded big points for each ball collected, so you want to keep as many as you can during the first phase. You complete the mode by getting the LAST ball into the Skeletor kicker.

Each multiball mode will play out similar. the difference is how you start the mode, and how many balls each MB mode has. Ripper has 2, Castle has 3, He-Man has 4, Skeletor has 9.

View attachment road ripper mb demo_1.mp4
 
Castle Multiball demo.

Once the Castle Ramp is unlocked and the castle mode is selected, then hit the ramp to make the castle rise up. Once its risen, then hit the ball through the castle 2 times to start Castle multiball.

Then... it's Party Time with a crazy lightshow! Everyone is joining in the groove... Skeletor, He-Man, Orko, Man At Arms, Modulok... even the snake!

All multiball modes require you to hit all the jackpot shots first to make Super Jackpot Ready. Then from that point on the mode won't stop even if you drain to one ball. Skeletor's target bank lowers.

Now you need to get as many remaining balls in there as you can for big points. You need to get the last ball in there to complete the mode and be rewarded with the Castle Grayskull toy!


View attachment castle mb - demo_1.mp4
 
You are setting a high bar Terry, can't wait to play it!
 
WORK IN PROGRESS

He-Man Multiball - "I... have... the PO-WEEEEEEEEER!!!!!"


=================================

This is how you make the most powerful pinball game in the universe! I LOVE how this turned out!

Once the He-Man kicker is unlocked and He-Man is selected, then hit the kicker to lock a ball. Do this three times to start He-Man multiball. He-Man raises his sword and shouts those words that brought so much joy to young 80's kids. "By the Power of Grayksull!"

You'll see the power of Grayskull fire down from the skies into the sword of power. This makes all the lights on the table flicker and surge with power! Then He-Man yells those words... the words we all love to hear....

"I... have... the PO-WEEEEEEEEEEEEEEER!"

Now you'll see He-Man radiate with the power of Grayskull animating from within, shown with powerful arcs of energy and lights flashing throughout the table! He-Man multiball beings with 4 balls being shot onto the playfield.

All multiball modes require you to hit all the jackpot shots first to make Super Jackpot Ready. Then from that point on the mode won't stop even if you drain to one ball. Skeletor's target bank lowers. Now you need to get as many remaining balls in there as you can for big points. You need to get the last ball in there to complete the mode and be rewarded with the Battle Armor He-Man toy!

If you are lucky enough to be able to play this in VR (when it's done)... you will be blown away. It looks amazing!

Yah... I have the power!

View attachment heman mb demo_1.mp4
 
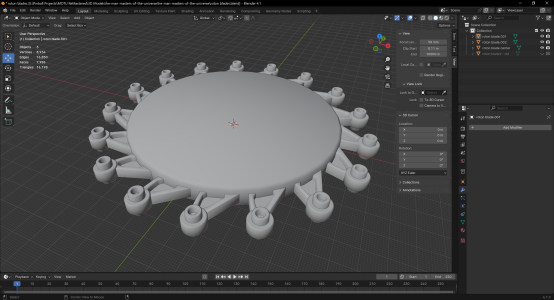
New Roton and Skeletor models

=================================

Rom did a great job at making models for the original FP table many years ago, given what limited resources he had back then.

1713082630740.png


Today, you can find 3d scans of the original 80's toys, or many detailed models built from scratch with modern 3D modeling apps. 3d printers and scanners have really opened up many great resources, or possibilities to learn how to make new models.

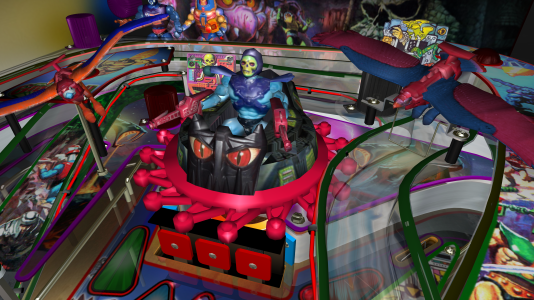
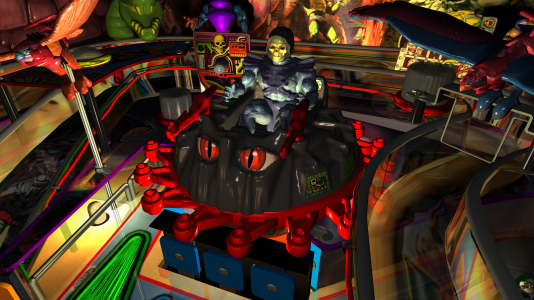
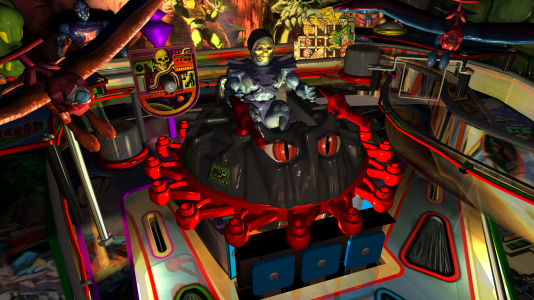
Well... I finally decided to make new models for the Roton and to finish Skeletor's new model.

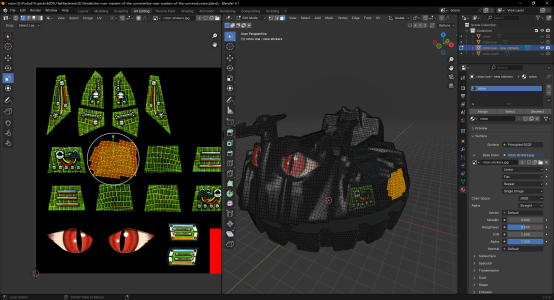
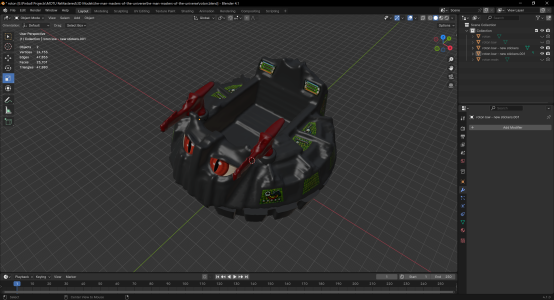
Lots of new modeling, converting, remeshing, uvwrapping, painting, and fixing scanned models. The original 80's toy was scanned into a 3d model, but that was way too detailed, so it needed to be converted down to a lower polygon model to be more practical for use in a game.

I was able to source some clean new redrawn stickers from the 80's Roton toy. So I needed to create new uvwraps for all of them... but boy did it make a huge difference.

1713082690051.png

1713082716289.png


I also decided to make an all-new rotating blade model, which really look nice with greater detail.

1713082746995.png


Skeletor's lower half was finally finished to match and fit with the new Roton model.

Turned out GREAT!

1713082774055.png


1713082819203.png


Video demo of Skeletor Multiball most likely coming.
 
Looks spectacular Terry!
I would love to put a GI JOE themed table together like your He-Man table!
Your work is inspiring!
 
Skeletor Multiball update

=================================

Finally, the last of the multiball modes is done.

For Skeletor multiball, you need to hit all 3 targets on the target bank to lower it, then shoot the ball into the Skeletor kicker (under the Roton) to lock the ball. Do this 3 times, then hit the target banks one last time to start Skeletor Multiball. Skeletor will quickly fire 9 balls at you!

All multiball modes require you to hit all the jackpot shots first to make Super Jackpot Ready. Then from that point on the mode won't stop even if you drain to one ball. Skeletor's target bank lowers.

Now you need to get as many remaining balls in there as you can for big points. You need to get the last ball in there to complete the mode and be rewarded with the Battle Armor Skeletor toy!

Any mode that is completed can't be replayed until all modes are completed and all toys collected (very hard to do!).

Now I can move on to other things like more Man-E Modes!

View attachment skeletor mb demo_1.mp4
 
... (very hard to do!).

I imagine, because making only one multiball can become complicated to test sometimes because you have to do it while playing and being a beta tester or be 100% sure when not forgetting anything in the code...
 
Some new baked lighting... now for the inserts. This is my first test with a few lights. Its a start... pay attention the the guide walls on the outerlanes.

View attachment 42206
That's very subtle but it really does add the to overall "realistic feel" to the table. I have soo many questions about how you are doing this. :)
 
How much time do you spend doing this stuff? It must take forever.
 
New Pre-Rendered Baked Lighting for Inserts

I finally decided to give this a try.

With VPX, it has no realtime dynamic lighting that renders in 3D space like most other videos games do. So to get around this limitation some newer VPX tables use the VP Blender Toolkit. It will import a VPX table into Blender, pre-render all lights on the table and bake them into textures, then cut every model that those lights touch into many 100's of smaller models (for each light combination). Then all the models and textures are added back into the VP table, and the rest of that process carries on from there.

On FP things are different. FP does have realtime dynamic 3D lighting that looks fantastic in all modes. You can make G.I., bulbs, flashers, spotlights, beacons all work with FP's dynamic lighting. It's easy to make tables look amazing, combined with shadowmaps, lightmaps and ray cast shadows... all created directly in FP itself without needing any other app. However, you can only have a limited number of these dynamic lights rendered at one time. So lights such as inserts can't use this lighting.

With MOTU CE, I already did some ray traced Blender pre-baking for G.I Lighting on the sidewalls and back wall, shadows on numerous models, and the VR Room. However, I finally decided to try to fill in the gap that always bothered me... the lack of inserts having more realistic looking lighting.

So I decided to take a similar, but different approach as VP Blender Toolkit tables. I looked at the inserts that were near any targets, metal walls, flipper, posts, the castle toy, etc and attempt to pre-render and bake lighting from those inserts into the textures for the nearby items. I did this in Blender manually for each item nearby an insert light and for each light's colour combination that was used.

I could have done the same as what you see on some VP BTK tables, and have the metals, clear plastics and reflective surfaces show the full reflection of the inserts and surrounding table items. I tested this and it worked fine. However there is a real problem with doing this... as those kind of prebaked textures only look "correct" from the one camera point of view (pov) that was used when they were baked in Blender. VP doesn't have dynamic camera views, so this is normally fine if you are using a static camera view (like in a cabinet) that never changes. Once you move the camera in-game or change to a very different pov, or play in VR and move your head around, then those reflective textures no longer look correct (they can still look cool though).

With FP however, it does have dynamic and moving cameras, and I also love playing FP in VR. So I rendered all the textures with no super glossy / reflective surfaces, and so they will look correct from all camera views and especially in VR, which FP really excels at.

I then imported all textures into FP and created new code that would monitor those lights in realtime. It will swap the pre-baked textures / control their brightness based on conditions of the gameplay, G.I lighting, what mode was being played, what colour the insert was set to, etc.

It turned out great! It really adds to the lighting and look of the game and fills that missing bit of lighting that stood out to me. Is it as good as a BTK VP table that does this for ALL lights and models on the table? No... but combined with FP's dynamic lighting and shadows this works very well and rounds everything out nicely!


View attachment Inserts Baking Demo.mp4
 
Seriously impressive. I thought all the built in game objects of the same type shared textures. Did you have to put in custom models for each?
 
This is looking very nice, thanks for sharing!

Am I correct in understanding that you choose only the closest insert to each object and bake out a custom texture for each color that the closest insert might turn? Multiple inserts each with a variety of colors acting on each object seems like the permutations could get unmanageable in the code (for myself at least!)

Also ... I am familiar with FP/BAM's shadowmaps, but what are lightmaps?
 
General chit-chat
Help Users
You can interact with the ChatGPT Bot in any Chat Room and there is a dedicated room. The command is /ai followed by a space and then your ? or inquiry.
ie: /ai What is a EM Pinball Machine?
  • No one is chatting at the moment.
      Chat Bot Mibs Chat Bot Mibs: qinnuendo has left the room.
      Back
      Top